When you’re using Zoom as your video chat platform for taking classes, it’s common for your teacher and you to exchange notes during a class using the chat feature.
Normally any Zoom chat will be deleted once you leave the class. To avoid this, our teachers will copy and paste the entire chat from Zoom to our platform at the end of the class. That way all of your notes will be saved in one place to review on an ongoing basis.
You can also enable Zoom’s auto-save chat feature in case you want to save all chat history to your computer
How to auto-save chats?
- Create a Zoom account here, if you haven’t done so already
- Go to your profile settings
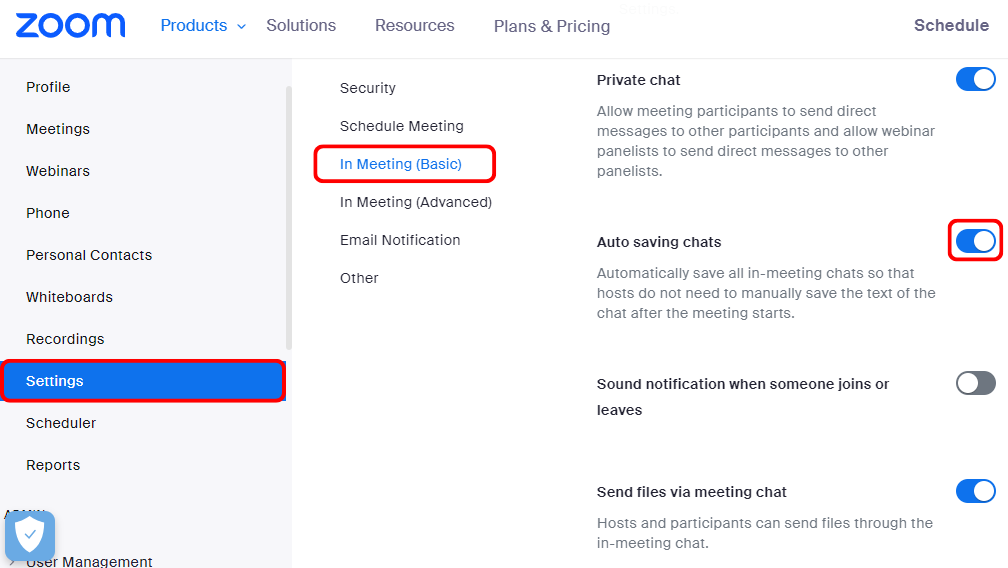
- Go to Settings, and click on the In Meeting (Basic) section
- Turn on the toggle for “Auto saving chats”
Now you can choose the location of your saved chats.
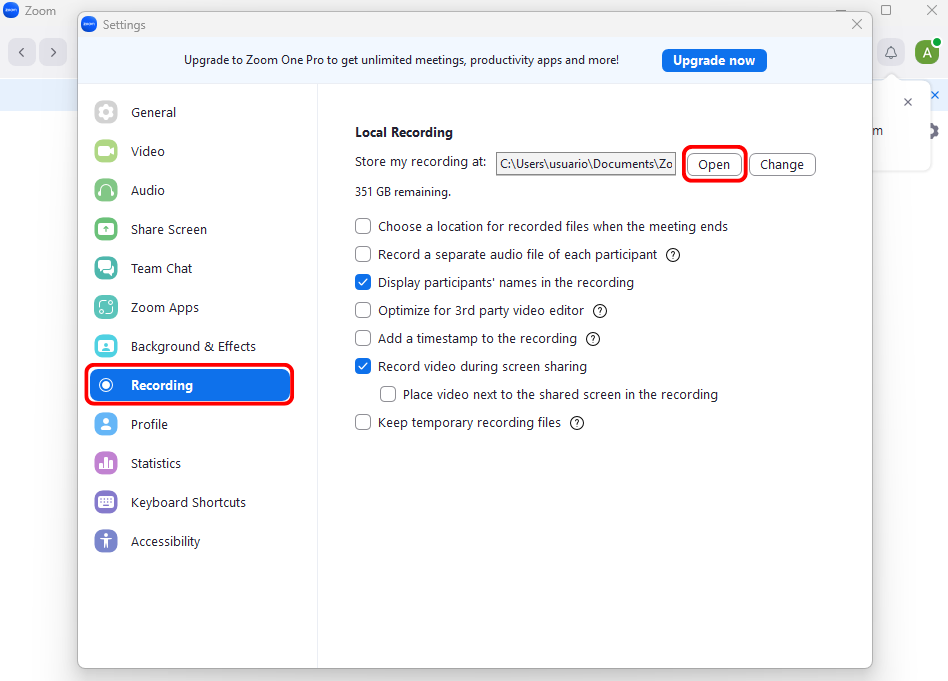
- Launch the Zoom application, click on your profile icon, and then Settings.

2. Select the “Recordings” tab, click Open and choose a folder on your PC where you wish to save your chat history.
3. Each chat will be time-stamped with the date and time of your class so that you can easily keep track of your notes.